If you also need to add SSL to localhost, you can do it in 5 minutes. Here’s a step by step tutorial.
Note: I’m using Ubuntu 14.04 guest on macOS. Instructions for other OS may be different.
Step 1: Generate the SSL Key and Certificate
On macOS, open terminal, go to your project folder (or vagrant root, vagrant needs to have access to these files) and enter following commands:
1openssl genrsa -out example.com.key 2048
2openssl req -new -x509 -key example.com.key -out example.com.cert -days 3650 -subj /CN=example.com
Make sure to replace example.com with your local development URL.
Step 2: Install Certificate on Vagrant’s Apache
Do a vagrant ssh to ssh into your vagrant box. Your apache configuration file should be under /etc/apache2/sites-enabled. In my case, it was 000-default.conf.
Here, we need to do two things:
- Add SSL certificate and key
- Redirect http to https
Add SSL Certificate and Key to Apache
To add SSL certificate and key, edit the file and look for a line that says DocumentRoot and paste following lines below it:
#adding custom SSL cert
SSLEngine on
SSLCertificateFile /vagrant/example.com.cert
SSLCertificateKeyFile /vagrant/example.com.key
Redirect http to https
Next, we need to redirect your local http site to https. Without it, you may get a browser error. Look for a line that says and change it to . This line tells apache to listen on port 443 for https requests. But, we still need to redirect non https traffic to https. For that, paste following block above the block that starts with :
<VirtualHost *:80>
        ServerName local.example.com
        DocumentRoot /vagrant
        Redirect permanent / https://local.example.com/
</VirtualHost>
Again, don’t forget to replace local.example.com with your development site address.
Enable SSL Module in Apache
If you restart apache now, you may get a configuration error like this:
Invalid command 'SSLEngine', perhaps misspelled or defined by a module not included in the server configuration
This may happen if mod_ssl_ is not enabled. To enable it, just run this command:
sudo a2enmod ssl
Step 3: Accept Certificate on Host
If you restart apache now, everything should be fine. Visit the site in the browser and you will see this scary warning:
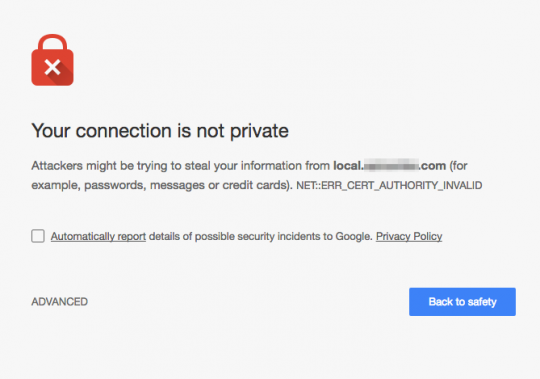
At this stage, you can click Advanced in Chrome and proceed. It will be better to make your OS trust this certificate however. To do that, open Keychain Access and drag cert file into System under Keychains.
Once it is imported, right click the imported certificate and click Get Info. Change first dropdown to Always Trust. Screenshot:
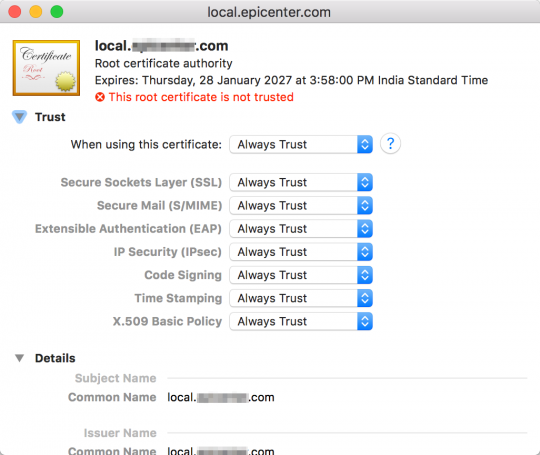
And we are done
Visit the site in your browser now and it should show up without any errors or warnings, with a secure icon and text in front of it:

And you are done. Did I miss anything?
Let me know and follow me on twitter for more tutorials and interesting tech and gaming related articles.